
I still remember the day my grandmother taught me how to make ice cream without a churner. It was a sweltering July afternoon, and as I collapsed dramatically onto her porch swing, fanning myself, she appeared with that knowing smile of hers. “Perfect timing,” she said, “the strawberry patch is bursting, and I was just about to make some ice cream.” That afternoon changed everything I knew about homemade desserts.
Today, I’m sharing my perfected recipe for No-Churn Strawberry Ice Cream—a tribute to my grandmother’s wisdom and a celebration of summer’s sweetest offering.
Why You’ll Love This Recipe
•No ice cream maker required – Just a few basic kitchen tools
•Incredibly creamy texture – No ice crystals, just smooth perfection
•Real strawberry flavor – Intensified through roasting
•Only 5 simple ingredients – Nothing artificial
•Make-ahead friendly – Perfect for summer gatherings
The Secret to Perfect No-Churn Ice Cream
My first attempts at no-churn ice cream were admittedly disastrous. I remember inviting my neighbor Sarah over to taste what I proudly called “strawberry ice cream” only to serve her something closer to a strawberry-flavored ice block. We still laugh about it years later.
The problem? I hadn’t understood the crucial role that fat plays in creating that luxurious, scoopable texture we associate with premium ice cream. The foundation of any good no-churn ice cream lies in its base—the creamy mixture that will eventually freeze into something magical.
After much experimentation (and several failed batches that my children politely ate anyway), I’ve found that the perfect combination is sweetened condensed milk paired with heavy whipping cream. This duo creates a base that’s rich enough to resist crystallization while freezing, yet light enough to maintain a delicate mouthfeel.
Sweetened condensed milk is the unsung hero here. It’s not just a sweetener; it’s a textural magician. The concentrated milk proteins and sugars lower the freezing point of the mixture, preventing it from becoming too hard in a home freezer. Meanwhile, the high fat content in the whipping cream creates tiny air pockets when whipped, essentially mimicking the churning process that commercial ice cream makers use.
Ingredients
•1 kg (2.2 lbs) fresh strawberries, hulled and halved
•1 tbsp sugar (for roasting)
•1 can (395g) sweetened condensed milk
•500ml (2 cups) full-fat whipping cream
•1 tsp vanilla extract (optional)
Kitchen Tools
•Baking sheet
•Parchment paper
•Food processor or blender
•Electric mixer
•Metal loaf pan or freezer-safe container
•Rubber spatula
•Plastic wrap or additional parchment paper
Instructions
Step 1: Roast the Strawberries
1.Preheat your oven to 160°C (320°F).
2.Spread the hulled and halved strawberries on a parchment-lined baking sheet.
3.Sprinkle with 1 tablespoon of sugar and toss gently to coat.
4.Roast for 1 hour, stirring halfway through. The strawberries should soften and release their juices.
5.Remove from oven and let cool completely.
Step 2: Prepare the Strawberry Base
1.Transfer the cooled roasted strawberries and all their juices to a food processor.
2.Blend until smooth, creating a thick purée.
3.In a large bowl, combine the strawberry purée with the sweetened condensed milk and vanilla extract.
4.Mix well for about 1.5 minutes until fully incorporated.
Step 3: Whip the Cream
1.In a separate large bowl, whip the cold heavy cream until stiff peaks form.
2.This usually takes 3-4 minutes with an electric mixer on medium-high speed.
3.Be careful not to overwhip, which can cause the cream to become grainy.
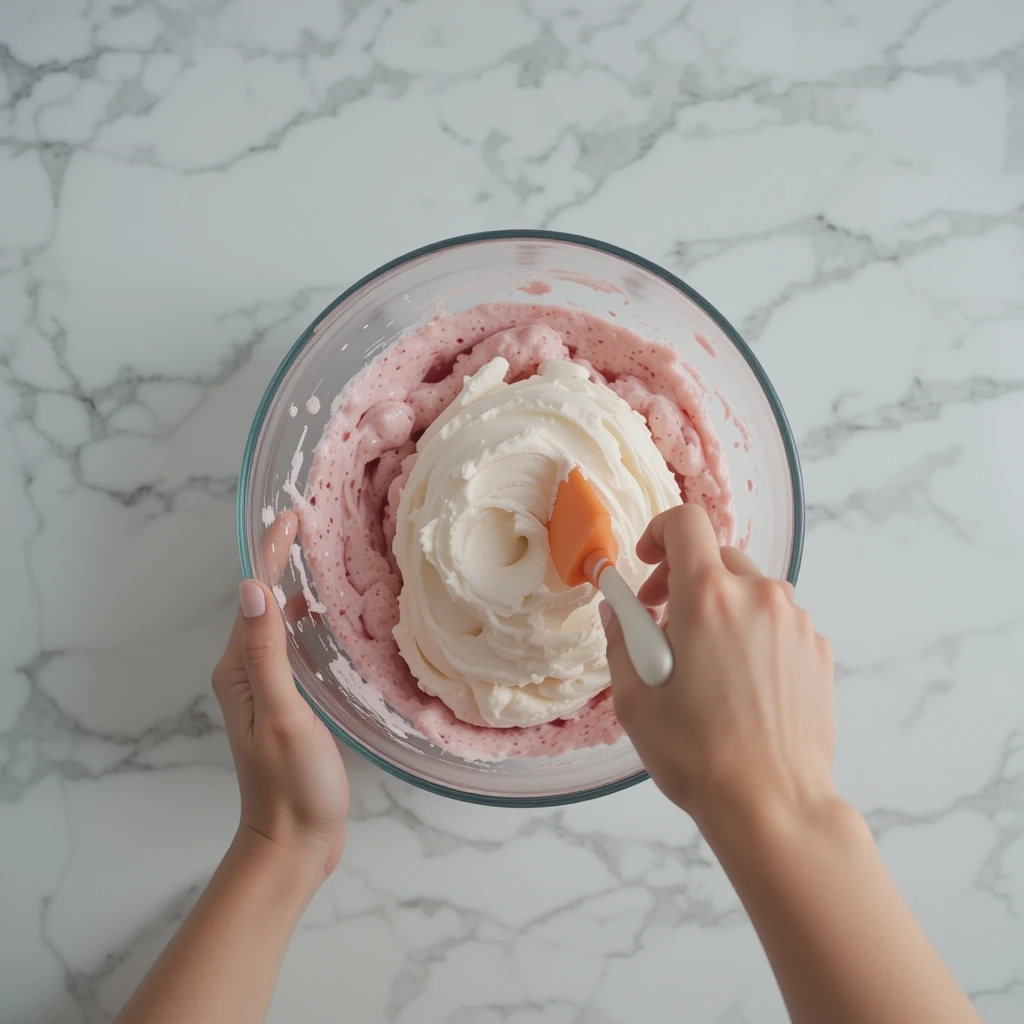
Step 4: Combine and Fold
1.Add about one-third of the whipped cream to the strawberry mixture.
2.Fold gently using a rubber spatula to lighten the base.
3.Add the remaining whipped cream and continue folding gently until no streaks remain.
4.Use a down-and-over motion, rotating the bowl as you go, to preserve as much air as possible.
Step 5: Freeze
1.Pour the mixture into a chilled metal loaf pan or freezer-safe container.
2.Smooth the top with your spatula.
3.Press a piece of parchment paper directly onto the surface of the ice cream to prevent ice crystals.
4.Cover with a lid or aluminum foil for extra protection.
5.Freeze for at least 12 hours, preferably 24 hours.
The Science Behind Perfect Homemade Ice Cream
When I first started making ice cream at home, I thought it was all about freezing fruit and cream together as quickly as possible. How wrong I was! Understanding the science behind ice cream has transformed my results from mediocre to magnificent.
Why Roasting Strawberries Works Wonders
When I first suggested roasting strawberries to my aunt, who considers herself something of an ice cream connoisseur, she looked at me like I’d suggested putting ketchup on a fine steak. “Why would you cook perfectly fresh strawberries?” she demanded. But after one taste of the finished product, she was immediately converted.
Here’s why roasting works such wonders: As the strawberries slowly cook in the oven, something magical happens. The water content reduces, concentrating the natural sugars and intensifying the flavor profile. The berries develop deeper, more complex notes—almost jammy, with caramelized edges that add dimension you simply can’t get from raw fruit.
When strawberries roast, their cell walls break down, releasing pectin—a natural thickener that helps create that luscious texture we’re after. The slight caramelization of the sugars creates new flavor compounds that weren’t present in the raw fruit. It’s essentially a form of natural flavor enhancement, no artificial additives required.
The Chemistry of Creaminess
Commercial ice creams often contain stabilizers and emulsifiers to achieve their texture. In our homemade version, we’re relying on fat and air incorporation instead. The fat in heavy cream coats the ice crystals that form during freezing, making them smaller and less perceptible on the tongue. Meanwhile, the air we’ve incorporated through whipping provides lightness.
The sweetened condensed milk plays another crucial role: sugar molecules interfere with the formation of large ice crystals. They get in between water molecules, preventing them from binding together into the large, crunchy crystals that ruin the texture of homemade frozen desserts.
Pro Tips for Perfect Ice Cream
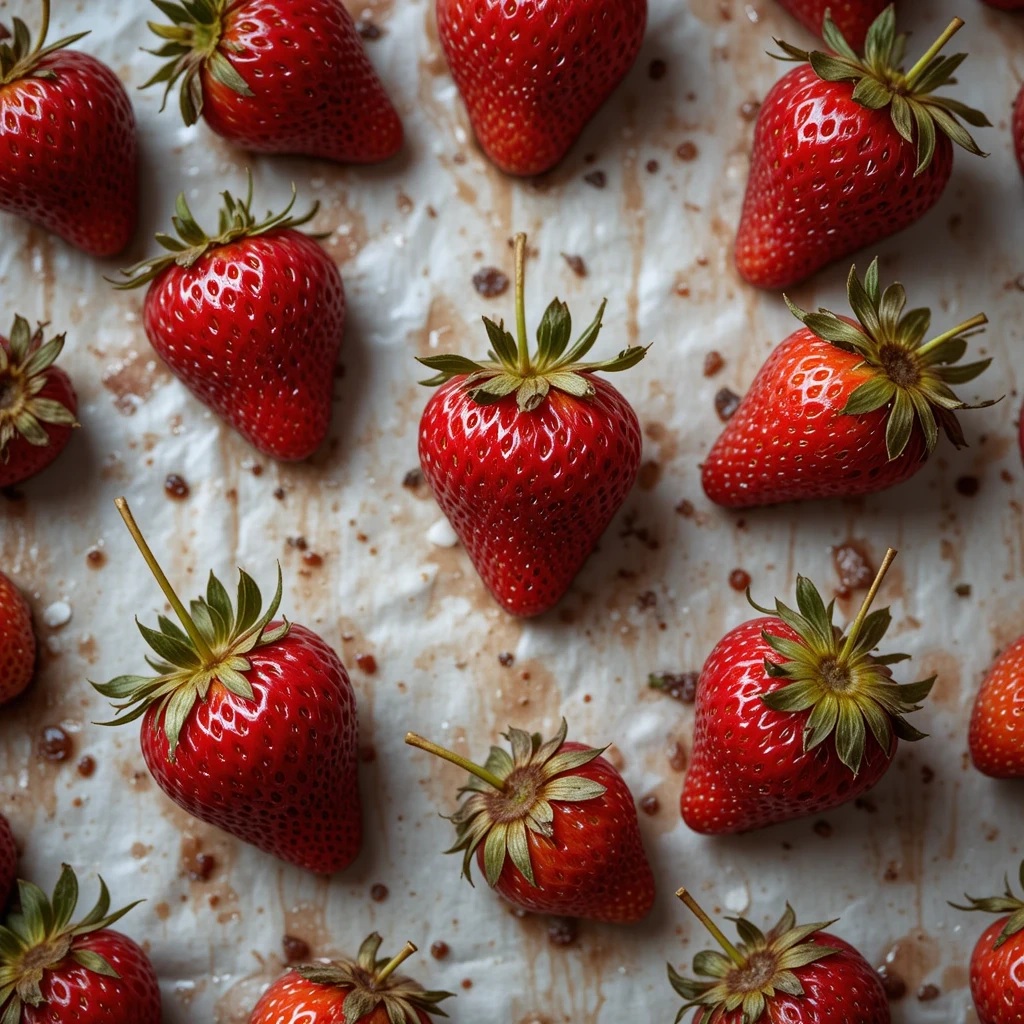
Selecting the Perfect Berries
Not all strawberries are created equal when it comes to ice cream making. I’ve learned through many batches that the best results come from fully ripe, preferably local berries at the peak of their season. Those giant, picture-perfect supermarket strawberries that look impressive but taste watery? They’ll produce a lackluster ice cream, no matter how carefully you follow the recipe.
Look for berries that are:
•Fully red with no white shoulders
•Fragrant (they should smell strongly of strawberry)
•Smaller to medium-sized (often more flavorful than jumbo varieties)
•Slightly soft but not mushy
The Art of the Fold
I learned the importance of proper folding technique the hard way. During one of my early attempts at this recipe, I was in a hurry to get the mixture into the freezer before picking up my daughter from her dance class. I roughly stirred everything together, congratulating myself on saving time. The result? A dense, heavy ice cream that lacked the ethereal lightness I was aiming for.
The folding technique is where science meets artistry in this recipe. When you whip cream, you’re essentially creating a delicate structure of fat molecules surrounding tiny air bubbles. This structure is what gives the ice cream its lightness and smooth texture. Stirring vigorously breaks these bubbles, deflating your mixture and resulting in a heavier final product.
I now approach the folding stage with almost meditative focus. Using a large rubber spatula, I start by adding about one-third of the whipped cream to the strawberry-condensed milk mixture, folding it in with gentle, deliberate movements. This lightens the base, making it easier to incorporate the remaining cream.
Temperature Matters
Both the strawberry mixture and the whipped cream should be properly chilled before folding. If the strawberry puree is still warm from roasting, it will melt the cream on contact, destroying that carefully created structure. I always allow the roasted strawberry mixture to cool completely in the refrigerator before proceeding with the recipe.
Freezing Fundamentals
My mother always says I inherited my impatience from my father’s side of the family. Nowhere is this character flaw more apparent than when I’m waiting for ice cream to freeze. During my first attempt at this recipe, I checked the freezer every thirty minutes, opening the door and poking at the mixture like an anxious parent checking on a sleeping baby. The result? Ice crystals galore, as the constant temperature fluctuations prevented the ice cream from freezing evenly.
Proper freezing is the final crucial step in creating perfect no-churn ice cream. The container matters—I use a metal loaf pan because metal conducts cold more efficiently than glass or plastic, allowing for more even freezing. Before pouring in my mixture, I chill the pan in the freezer for about 15 minutes, giving the ice cream a head start.
The most significant improvement I’ve made to my grandmother’s original method is pressing a piece of parchment paper directly onto the surface of the ice cream before freezing. This simple step prevents air exposure, which is the primary culprit behind those dreaded ice crystals that can ruin texture.
Common Mistakes to Avoid
Over the years, I’ve made every possible mistake with this recipe. Let me save you the trouble by sharing what NOT to do:
1. Using cold strawberries straight from the refrigerator
Cold strawberries won’t roast properly—they’ll steam instead. Let them come to room temperature before roasting for better caramelization.
2. Rushing the cooling process
Patience is key! If you combine warm strawberry puree with cold cream, you’ll end up with a soupy mess. Allow the roasted strawberries to cool completely.
3. Overwhipping the cream
There’s a fine line between stiff peaks and butter. If you whip too long, the fat molecules in the cream will clump together, creating a grainy texture in your ice cream.
4. Stirring instead of folding
Vigorous stirring destroys the air bubbles in your whipped cream. Use a gentle folding motion to preserve that airy texture.
5. Skipping the parchment paper cover
This simple step prevents ice crystals from forming on the surface of your ice cream. Don’t skip it!
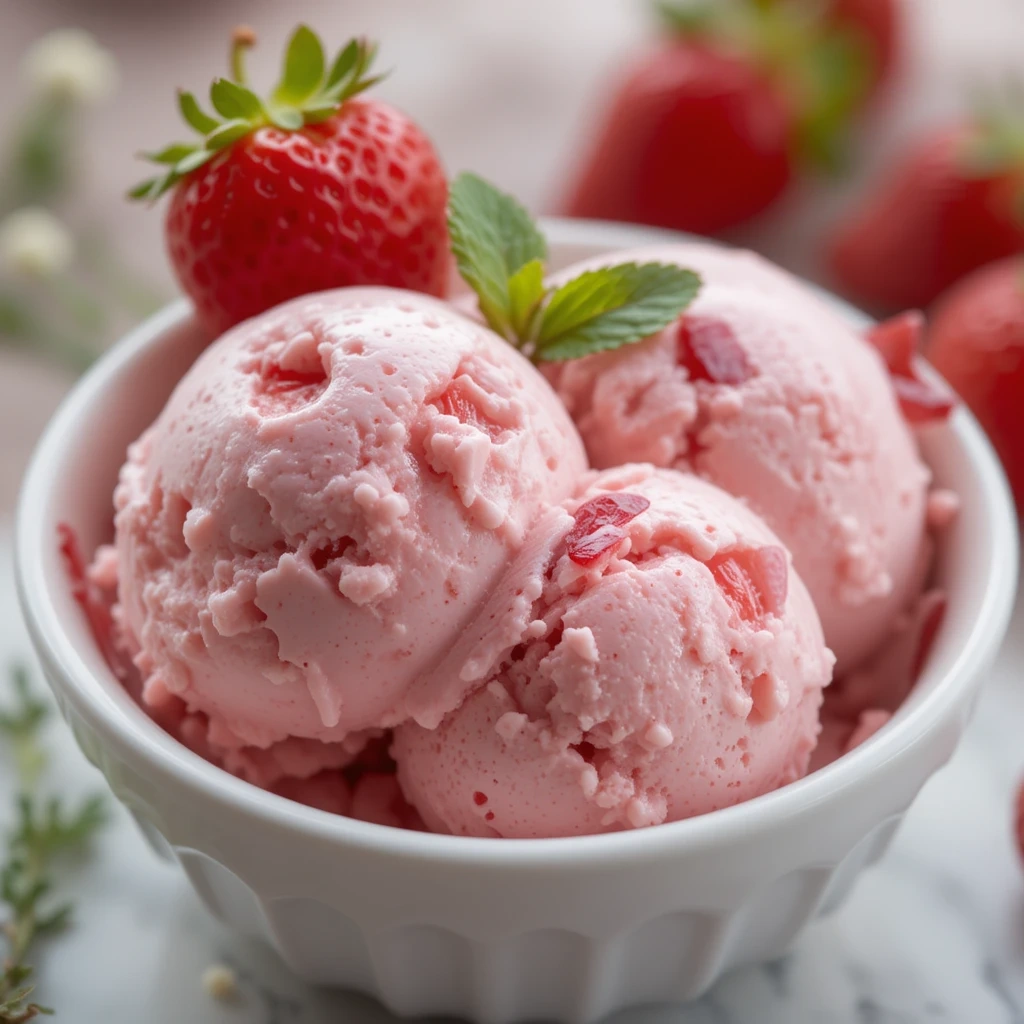
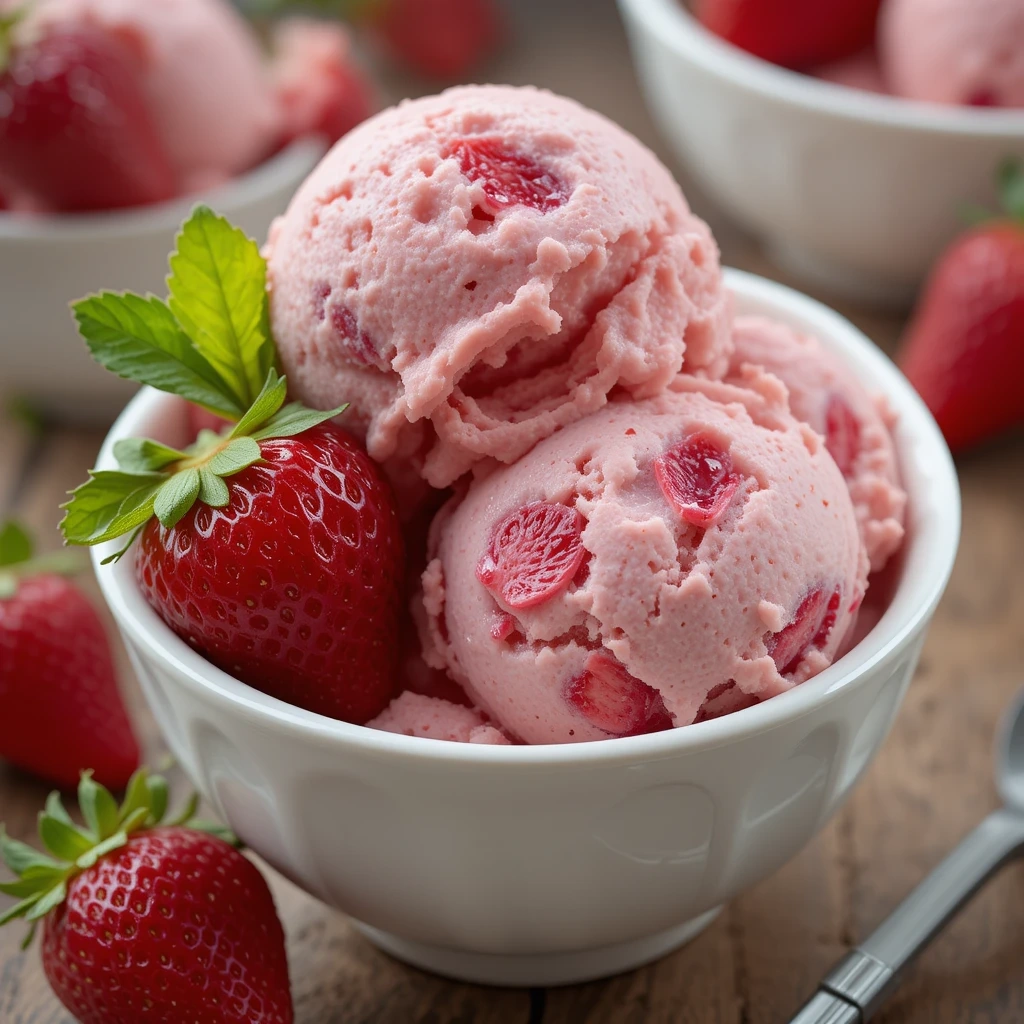
Serving Suggestions
I’ve always believed that presentation matters almost as much as taste. My first dinner party featuring this ice cream taught me that lesson clearly. I had spent hours perfecting the recipe but then simply scooped it into plain white bowls. My friend Maria, a food stylist, quietly suggested a few simple enhancements that transformed the dessert from merely delicious to truly memorable.
•Serve in chilled bowls or cones for the classic experience
•Top with fresh strawberries for extra berry goodness
•Pair with warm brownies or chocolate cake for a delightful contrast
•Add a drizzle of aged balsamic reduction for a sophisticated twist
•Serve alongside shortbread cookies for a simple but elegant dessert
•Create an ice cream sandwich using thin ginger cookies
•Layer with crumbled meringue and additional whipped cream for a quick strawberry Eton mess
The ideal serving temperature is slightly softer than you might expect. I remove my ice cream from the freezer about 5-10 minutes before serving, allowing it to soften just enough to release its full flavor profile. Extremely cold temperatures numb the taste buds, muting the complex strawberry notes we’ve worked so hard to develop.
Creative Variations
My youngest son once asked why we always make “just strawberry” ice cream. His question sparked a summer of experimentation that expanded our no-churn repertoire considerably. While the classic recipe remains my favorite, I’ve discovered several variations that are equally delightful.
•Berry Medley: Replace a portion of the strawberries with raspberries or blackberries for a more complex berry flavor. The tartness of these fruits cuts through the sweetness beautifully.
•Chocolate Strawberry: Fold in roughly chopped dark chocolate before freezing. The contrast between the creamy strawberry base and the snappy chocolate pieces is divine.
•Strawberry Cheesecake: Add 4 oz softened cream cheese to the strawberry base and fold in crushed graham crackers just before freezing.
•Strawberry Basil: Add 5-6 fresh basil leaves when blending the roasted strawberries. The herbaceous notes create an unexpectedly elegant dessert with subtle complexity.
•Strawberry Balsamic: Add 1 tablespoon of balsamic vinegar to the strawberries before roasting. The acidity enhances the fruit flavor while adding an intriguing depth.
•Strawberry Coconut: Replace half the heavy cream with coconut cream for a tropical twist that pairs beautifully with the strawberry flavor.
•Strawberry Swirl: Instead of fully incorporating the strawberry puree, gently swirl it through the whipped cream mixture for a marbled effect.
For dinner parties, I sometimes add a splash of liqueur to the base. Grand Marnier creates a sophisticated strawberry-orange profile, while a tablespoon of good quality bourbon adds warming notes that complement the roasted berries. Remember that alcohol lowers the freezing point, so these versions require a bit more freezing time and will have a slightly softer texture.
Frequently Asked
How long will this ice cream keep in the freezer?
For best quality, enjoy within 2 weeks. Always store with parchment paper pressed against the surface to prevent ice crystals.
Can I use frozen strawberries?
Fresh is best for roasting, but if using frozen, thaw completely and drain excess liquid before roasting. You may need to roast them a bit longer.
Can I make this recipe dairy-free?
Yes! Substitute the heavy cream with full-fat coconut cream and use sweetened condensed coconut milk instead of regular condensed milk. The result has a subtle coconut undertone that pairs surprisingly well with strawberries.
Do I really need to roast the strawberries?
Yes, this is the key step that prevents ice crystals and intensifies flavor. If you’re short on time, you could cook them on the stovetop instead, but the flavor won’t be quite as rich.
Can I use other fruits with this method?
Absolutely! This roasting technique works beautifully with peaches, nectarines, plums, and even mangoes. Adjust roasting times based on the water content of the fruit.
My ice cream has tiny ice crystals. What went wrong?
This usually happens when the ice cream is exposed to air or temperature fluctuations. Make sure to press parchment paper directly onto the surface before freezing and avoid frequent opening of the freezer during the freezing process.
The Joy of Sharing
My grandmother passed away three summers ago. At her memorial gathering, I surprised the family with batches of her strawberry ice cream, made from the very recipe she had taught me years before. As relatives took their first bites, I watched tears mingle with smiles—the familiar flavor bringing back memories of summer gatherings and her generous spirit.
I’ve taught this recipe to my own children now, guiding their small hands through the folding process, letting them take turns pressing the parchment paper onto the surface before freezing. My daughter has already added her own twist—a sprinkle of lemon zest that brightens the flavor in a way I never considered. The recipe evolves, as recipes should, carrying forward the core technique while welcoming new influences.
This no-churn strawberry ice cream has become more than just a dessert in our home. It’s a tradition, a skill passed down, a celebration of summer’s abundance, and a reminder that the simplest pleasures are often the most meaningful. As you make this recipe in your own kitchen, I hope it brings you the same joy it has brought to my family over the years.