
I’ll never forget the summer my niece, a budding nutritionist with an aversion to anything processed, introduced me to “nice cream.” I was skeptical, to say the least. My idea of ice cream involved heavy cream, sugar, and a churner. She, however, with a mischievous glint in her eye, presented me with a bowl of what looked exactly like soft-serve, but tasted incredibly fresh, sweet, and utterly guilt-free. “It’s just bananas!” she declared, and I remember thinking, “This is either genius or madness.” It was, in fact, pure genius. This simple revelation transformed my perception of frozen desserts, proving that a truly satisfying, creamy treat doesn’t need added sugars or complex ingredients. This banana nice cream recipe, which I’m thrilled to share, is a testament to that simplicity, offering a delightful and healthy alternative to traditional ice cream.
Why This Simple Treat is a Game-Changer
In a world increasingly focused on healthier eating and mindful indulgence, banana nice cream stands out as a beacon of simplicity and natural goodness. It’s not just a dessert; it’s a versatile base for countless flavor combinations, a quick snack, and a testament to the power of whole foods. Its appeal lies in its minimal ingredient list, ease of preparation, and the surprisingly rich, creamy texture it achieves without any dairy or added sweeteners. This makes it an ideal choice for anyone looking to reduce sugar intake, embrace plant-based eating, or simply enjoy a refreshing treat that truly nourishes the body.
The Magic of Minimal Ingredients: Just Bananas!
At its core, this recipe celebrates the humble banana. It’s astonishing how a single fruit, when properly prepared, can transform into a dessert so reminiscent of soft-serve ice cream. The primary ingredient is simply ripe, frozen bananas. This minimalist approach not only keeps the recipe incredibly healthy but also highlights the natural sweetness and creamy texture inherent in bananas. There are no artificial flavors, no preservatives, and no hidden sugars. This purity of ingredients means you’re enjoying a dessert that’s as close to nature as possible, making it a perfect choice for those with dietary restrictions or a desire for clean eating. The optional additions of milk and vanilla are merely enhancers, not necessities, further emphasizing the banana’s starring role.
No Special Equipment? No Problem!
One of the most appealing aspects of this banana nice cream recipe is its accessibility. Unlike traditional ice cream, which often requires an expensive and bulky ice cream maker, this recipe relies on common kitchen appliances. A high-powered blender or a food processor is all you need to achieve that coveted smooth and creamy consistency. This eliminates the barrier to entry for many home cooks, making homemade frozen treats a reality for everyone. The simplicity of the equipment also means less cleanup and more time to enjoy your delicious creation. It’s a testament to how innovative techniques can bypass the need for specialized machinery, bringing gourmet-quality desserts into any kitchen.
Achieving Unparalleled Creaminess: A Texture Masterclass
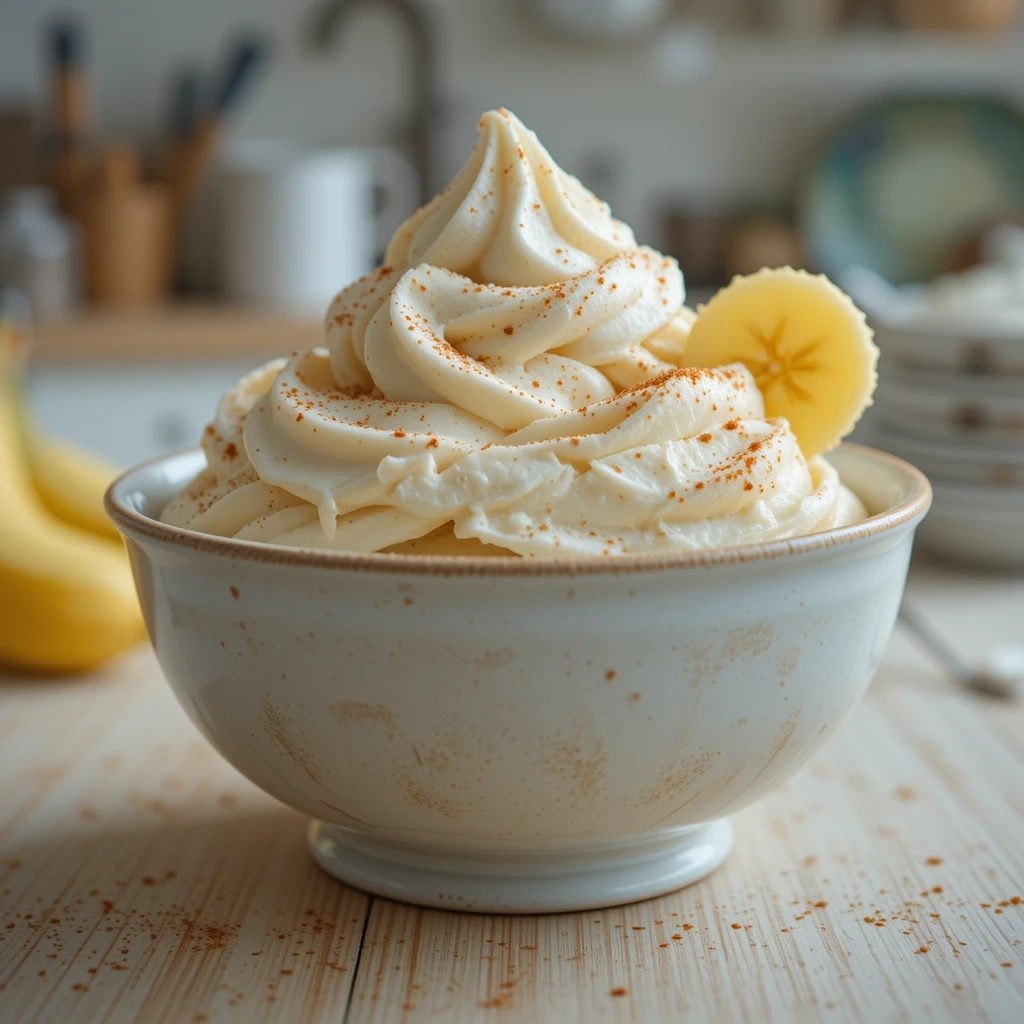
The texture of banana nice cream is what truly sets it apart. It’s remarkably smooth, thick, and creamy, mimicking the luxurious mouthfeel of traditional soft-serve without any dairy or added fats. This incredible creaminess is due to the unique composition of bananas. When frozen and then blended, the low water content and natural starches in bananas create a dense, velvety texture that resists the formation of large ice crystals. This is the secret behind its scoopable, non-icy consistency. The rapid blending process also incorporates tiny air pockets, contributing to its light and airy feel. It’s a delightful paradox: a simple fruit transformed into a sophisticated dessert through a clever application of freezing and blending techniques.
A Naturally Sweet Delight: Ditching Added Sugars
In an era where excessive sugar consumption is a growing concern, this recipe offers a refreshing alternative. The inherent sweetness of ripe bananas means there’s absolutely no need for added sugars, syrups, or artificial sweeteners. This makes banana nice cream an excellent choice for those managing blood sugar levels, seeking healthier dessert options, or simply aiming to reduce their overall sugar intake. The natural sugars in bananas provide a satisfying sweetness that is both wholesome and delicious, allowing you to indulge without the guilt. It’s a pure, unadulterated sweetness that comes directly from nature, making it a truly nourishing treat.
Versatility and Customization: Your Canvas for Flavor
Beyond its core simplicity, banana nice cream is incredibly versatile, serving as a perfect canvas for a myriad of flavor variations and toppings. Whether you’re craving chocolate, peanut butter, or a burst of fruity freshness, this recipe can be easily adapted to suit your palate. This adaptability is what makes it a favorite among those who love to experiment in the kitchen. From simple additions like cocoa powder or nut butter to more elaborate combinations with frozen fruits or spices, the possibilities are endless. It’s a dessert that encourages creativity, allowing you to personalize each batch to your exact preferences, ensuring that you never get bored with this healthy staple.
The Science of Sweetness: Why Bananas Work Wonders
My journey into the world of banana nice cream led me to appreciate the fascinating science behind its creamy texture and natural sweetness. It’s not just a happy accident; it’s a clever interplay of the banana’s unique properties and the freezing process. Understanding these principles helps to ensure consistent success and allows for creative experimentation, turning a simple fruit into a culinary marvel. The key lies in how bananas behave when subjected to cold temperatures and mechanical blending, creating a structure that defies the typical icy fate of frozen fruit.
Banana’s Unique Composition: The Anti-Ice Crystal Secret
The secret to the unparalleled creaminess of banana nice cream lies in the banana’s specific composition. Unlike many other fruits, bananas have a relatively low water content and a high concentration of natural starches and pectin. When bananas are frozen, the water molecules within them crystallize, but because there’s less free water and more solids, these ice crystals remain very small. More importantly, the starches and pectin act as natural emulsifiers and thickeners. When these frozen banana pieces are rapidly blended, the small ice crystals are pulverized, and the starches and pectin create a smooth, almost gelatinous matrix that traps air. This results in a dense, yet incredibly creamy texture that is resistant to becoming hard and icy, a common issue with other fruit-based frozen desserts.
Natural Sweetness: A Flavorful Freezing Point Depressant
Ripe bananas are naturally sweet, containing a significant amount of fructose, glucose, and sucrose. These natural sugars play a crucial role beyond just flavor; they act as natural freezing point depressants. In simple terms, sugars lower the temperature at which water freezes. This means that the banana mixture doesn’t freeze as solid as pure water would, allowing it to remain pliable and scoopable even when frozen. This natural sugar content eliminates the need for any added sweeteners, making the banana nice cream a healthier option. The riper the banana, the sweeter it will be, and the more effective it will be at preventing excessive hardness in the final product, ensuring a consistently pleasant texture.
The Role of Blending: Air Incorporation Without Churning
The high-powered blending process is the final piece of the puzzle in achieving the perfect banana nice cream texture. While traditional ice cream machines continuously churn to incorporate air and prevent large ice crystals, a powerful blender achieves a similar effect through rapid, intense pulverization. As the frozen banana pieces are blended, they are not only broken down into a smooth purée, but air is also whipped into the mixture. This aeration is vital for creating a light, fluffy, and voluminous texture. The key is to blend just enough to achieve smoothness without over-blending, which could generate too much heat and melt the mixture. The pulsing technique, combined with scraping down the sides, ensures efficient blending and optimal air incorporation, resulting in that delightful soft-serve consistency.
Ingredients You’ll Need
Embarking on your banana nice cream journey requires only a handful of simple ingredients, most of which you likely already have in your kitchen. The beauty of this recipe lies in its accessibility and the purity of its components, allowing you to create a wholesome and delicious frozen treat with minimal fuss. I’ve carefully selected these ingredients to ensure optimal flavor, texture, and ease of preparation, making this a go-to recipe for healthy indulgence.
•4 very ripe bananas, peeled, sliced, and frozen: These are the star of our show. The ripeness is crucial – look for bananas with plenty of brown spots, as they are sweeter and have a softer texture when frozen, which contributes to the ultimate creaminess. Slicing them before freezing ensures they blend more easily and evenly, preventing your blender from struggling. Freezing them flat on a baking tray prevents them from clumping together, making them easier to add to the blender.
•2 tbsp milk of choice (plant-based or dairy) – optional: While optional, a splash of milk can be a lifesaver if your blender is struggling to process the frozen bananas. It helps to lubricate the blades and achieve a smoother consistency without significantly thinning the mixture. I personally prefer unsweetened almond milk or oat milk for a completely plant-based option, but any milk will work. Start with a small amount and add more only if necessary, as too much liquid can make the nice cream less thick.
•½ tsp vanilla extract – optional: A touch of vanilla extract can enhance the overall “ice cream” flavor, adding a subtle warmth and depth that complements the natural sweetness of the bananas. While not strictly necessary, I find it elevates the taste, making the banana nice cream feel more like a traditional dessert. Be sure to use pure vanilla extract for the best flavor.
Essential Equipment for Nice Cream Success
One of the most appealing aspects of making banana nice cream is that it doesn’t require any specialized or expensive equipment. You likely already own everything you need to whip up this delightful frozen treat. This accessibility makes it a perfect recipe for quick, spontaneous cravings or for those just starting their journey into homemade healthy desserts.
•High-powered blender or food processor: This is the most crucial piece of equipment. A powerful motor is essential to break down the frozen banana slices into a smooth, creamy consistency without overheating. While a standard blender might work, a high-powered one will yield the best results with minimal effort. A food processor is also an excellent alternative, especially for larger batches.
•Flexible spatula: An indispensable tool for scraping down the sides of your blender or food processor during the blending process. Frozen bananas can stick to the sides, and a flexible spatula ensures all ingredients are incorporated evenly, leading to a consistently smooth texture.
•Metal loaf pan (optional, for firmer texture): While you can enjoy your nice cream immediately as a soft-serve, a metal loaf pan is useful if you prefer a firmer, scoopable consistency. Metal conducts cold efficiently, helping the nice cream to set more quickly and evenly. Any freezer-safe container will work, but a metal pan is ideal for achieving that perfect scoop.
Step-by-Step Instructions for Perfect Banana Nice Cream
Creating this creamy banana nice cream is incredibly simple, broken down into just a few straightforward steps. The key to success lies in proper preparation and a little patience. Follow these instructions, and you’ll be enjoying a delicious, healthy frozen treat in no time.
Step 1: Freeze the Bananas
This initial step is critical for achieving the desired creamy texture. Do not skip or rush this part, as the freezing process is what transforms the bananas into an ice cream-like consistency.
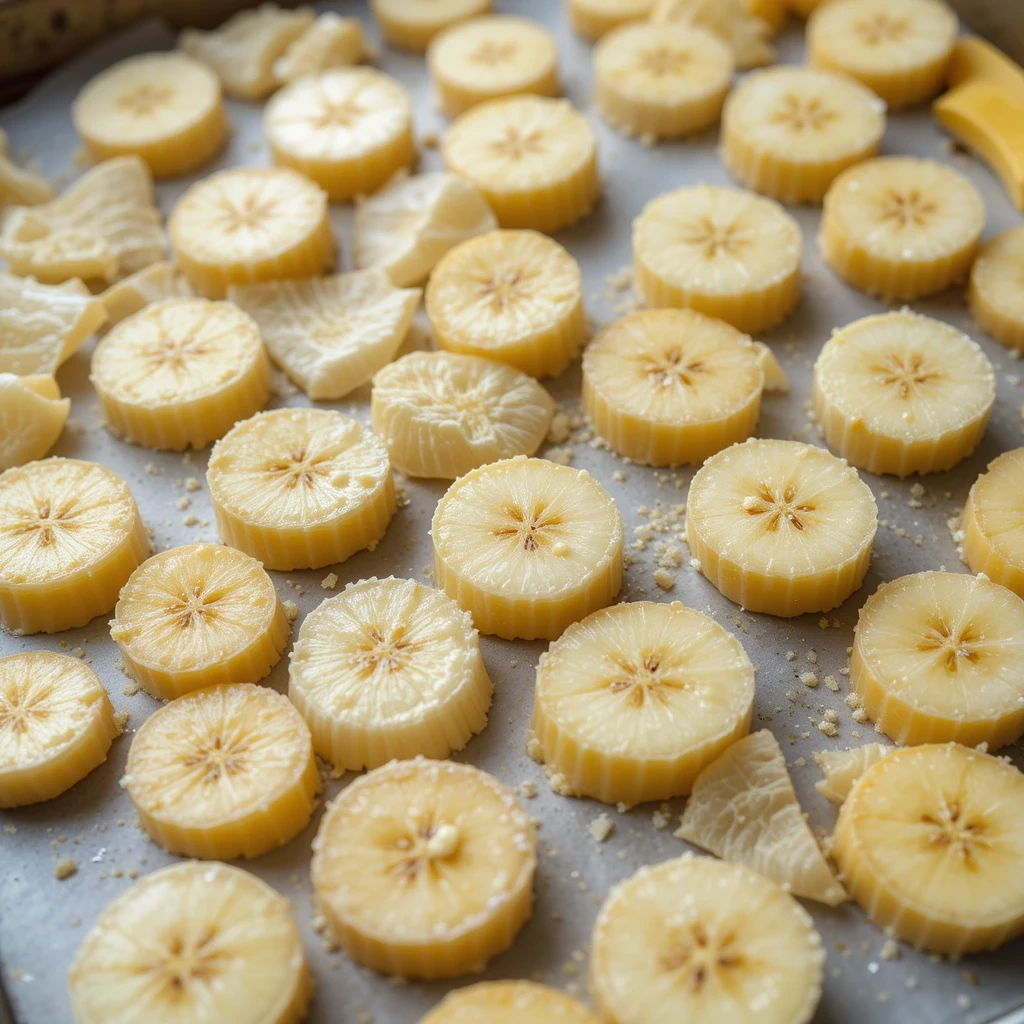
1.Slice the bananas into ~½ cm (¼ inch) rounds: Uniform slices ensure even freezing and blending. Thinner slices will freeze faster and blend more easily, reducing the strain on your blender.
2.Lay them flat on a baking tray lined with parchment paper: Arranging the slices in a single layer prevents them from sticking together in a large frozen clump. Parchment paper ensures they don’t stick to the tray, making them easy to remove once frozen.
3.Freeze for at least 4 hours, ideally overnight: Adequate freezing time is essential. The bananas need to be completely solid to achieve the right texture when blended. Freezing them overnight is the best approach to ensure they are thoroughly chilled and ready for blending.
Step 2: Blend to Creamy Perfection
This is where the magic happens! The blending process transforms the frozen banana slices into a smooth, creamy, and delightful frozen dessert. Patience and proper technique are key here.
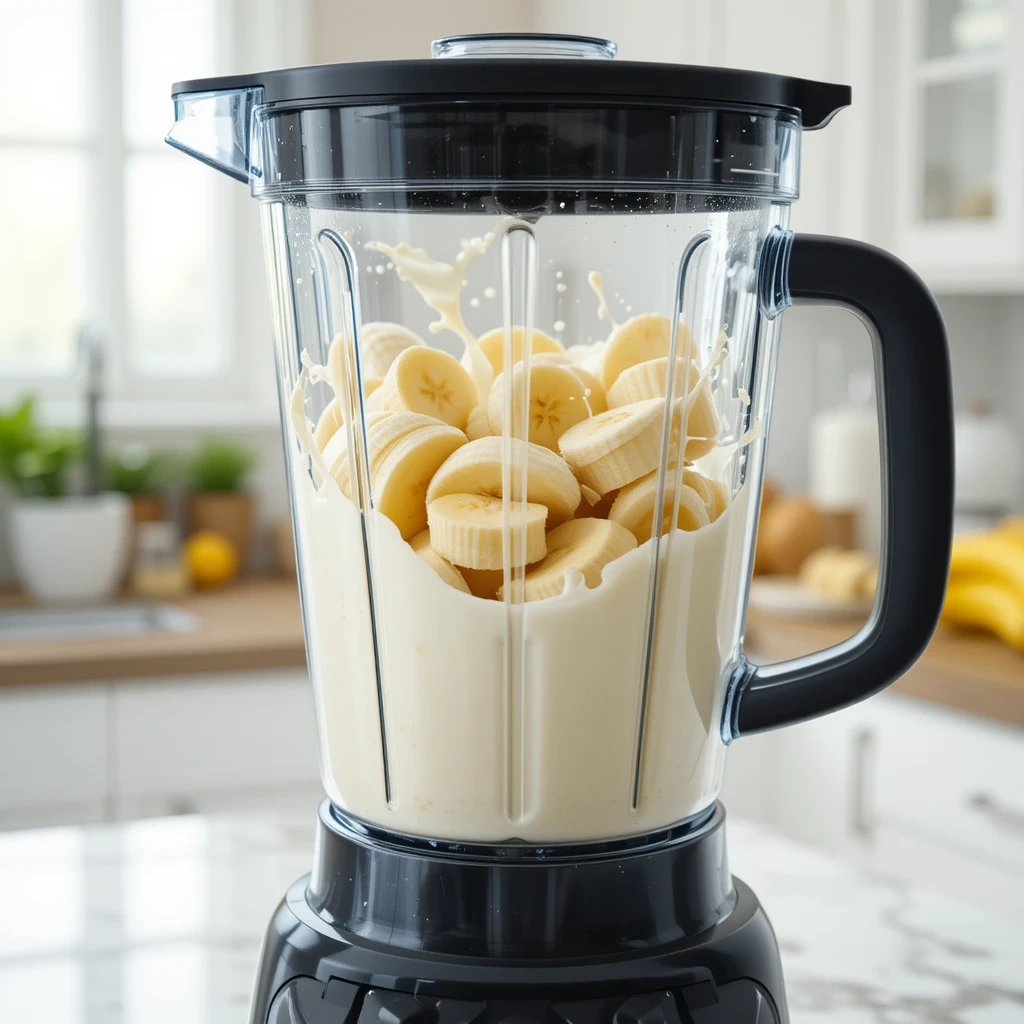
1.Add the frozen banana slices to the blender: Transfer all the frozen banana slices into your high-powered blender or food processor. Ensure your appliance is capable of handling frozen ingredients to avoid damage.
2.Optionally, add the milk and vanilla to help with blending: If your blender is struggling, or if you prefer a slightly thinner consistency, add the optional milk and vanilla extract now. Start with a small amount of milk (1 tablespoon) and add more only if absolutely necessary. This helps to create a vortex and ensures smoother blending.
3.Pulse in intervals, scraping down the sides as needed, until the mixture is smooth and creamy (1–2 minutes total): This is the most important part of the blending process. Do not just turn the blender on high. Instead, use the pulse function. Pulse for a few seconds, then stop and use your flexible spatula to scrape down any banana pieces stuck to the sides. Repeat this pulsing and scraping process. It might seem like nothing is happening at first, but gradually, the bananas will break down and transform into a thick, creamy, soft-serve-like consistency. This usually takes 1 to 2 minutes of total blending time. Avoid over-blending, as it can warm the mixture and make it less firm.
Step 3: Serve and Enjoy!
Once blended, your banana nice cream is ready to be enjoyed immediately, or you can chill it further for a firmer texture. The serving style depends on your preference.
1.Enjoy immediately as a soft-serve texture: The moment it reaches that smooth, creamy consistency in the blender, it’s perfect for serving as a soft-serve. Scoop it directly into bowls or cones and savor its fresh, cold, and naturally sweet flavor.
2.OR transfer to a metal loaf pan, smooth the top, and freeze for 30 min to 2 hours for a firmer scoopable consistency: If you prefer a firmer, more traditional ice cream texture, transfer the freshly blended nice cream into a metal loaf pan or any freezer-safe container. Smooth the top with your spatula. Place it back in the freezer for an additional 30 minutes to 2 hours. The exact time will depend on your freezer’s temperature and your desired firmness. This step allows the nice cream to firm up slightly, making it easier to scoop into perfect rounds.
Serving Tips for Optimal Enjoyment
To ensure you get the best experience from your homemade banana nice cream, a few simple serving tips can make all the difference. These suggestions will help you achieve the ideal texture and maximize your enjoyment of this healthy frozen treat.
•If the Nice Cream becomes too hard overnight, let it sit at room temperature for 10 minutes before scooping: Because this recipe contains no artificial stabilizers, it can freeze quite solid if left in the freezer for an extended period, especially overnight. If you find your nice cream too hard to scoop directly from the freezer, simply remove it and let it sit on your counter at room temperature for about 10 minutes. This brief thawing period will soften it to a perfectly scoopable consistency, allowing you to enjoy its creamy texture without a struggle.
Viral Flavor Variations: Unleash Your Creativity
One of the most exciting aspects of banana nice cream is its incredible versatility. It serves as a fantastic base for a myriad of flavor combinations, many of which have gone viral on social media platforms like TikTok. These variations allow you to customize your treat to suit any craving, transforming a simple banana into a gourmet dessert. Here are some popular and delicious ideas to inspire your culinary creativity:
Choco-Banana: A Decadent Delight
•Add 1 tbsp unsweetened cocoa powder + 1 tsp maple syrup: For a rich, chocolatey twist that tastes like a healthy brownie batter, simply add unsweetened cocoa powder and a touch of maple syrup to your blender along with the frozen bananas. Blend until smooth, and you’ll have a decadent chocolate banana nice cream that’s surprisingly good for you. The maple syrup enhances the sweetness and balances the bitterness of the cocoa.
Peanut Butter: Protein-Packed Indulgence
•Add 1 tbsp peanut butter: For a more filling and protein-packed version, a spoonful of creamy peanut butter works wonders. Add it to the blender with your frozen bananas and blend until fully incorporated. The peanut butter adds a rich, nutty flavor and an extra layer of creaminess, making it a satisfying snack or dessert that keeps you full longer.
Strawberry: Fruity and Refreshing
•Add ½ cup frozen strawberries + 1 tsp syrup: For a vibrant, fruity, and refreshing treat, combine frozen strawberries with your bananas in the blender. A small amount of syrup can be added to enhance the sweetness if your strawberries are tart. This variation yields a beautiful pastel pink color and a delightful berry flavor, perfect for a summer day.
Affogato Fit: The Trendy Hot/Cold Contrast
•Scoop + 1 hot espresso shot: Inspired by viral trends, this sophisticated variation combines the cold creaminess of nice cream with the warmth and bitterness of coffee. Simply scoop your plain banana nice cream into a bowl and pour a hot shot of espresso over it. The contrast in temperature and flavor is incredibly satisfying, creating a unique dessert experience that’s both invigorating and indulgent.
Storage for Lasting Freshness
Proper storage is key to maintaining the creamy texture and freshness of your banana nice cream. While it’s best enjoyed fresh, you can certainly make a larger batch and store leftovers for future cravings. Following these guidelines will help prevent ice crystals and ensure your nice cream remains delicious for days.
•Transfer leftovers to an airtight container: Once you’ve enjoyed your initial serving, transfer any remaining nice cream into an airtight container. This prevents air exposure, which is the primary cause of freezer burn and ice crystal formation.
•Place parchment or plastic wrap directly on the surface to reduce ice crystals: For an extra layer of protection, press a piece of parchment paper or plastic wrap directly onto the surface of the nice cream before sealing the container. This creates a barrier that further minimizes air contact, ensuring a smoother texture when you’re ready to enjoy it again.
•Best enjoyed within 7 days for ideal creamy texture. After that, let it thaw longer before scooping: While banana nice cream can technically be stored for longer, its texture is at its peak within the first week. Beyond that, it may become slightly firmer. If it does, simply let it sit at room temperature for a bit longer (15-20 minutes) before scooping to regain its creamy consistency. This ensures you always get to enjoy it at its best.
Disclaimer: The information provided in this article is for educational and informational purposes only, and does not constitute professional advice. It is not intended to be a substitute for professional medical advice, diagnosis, or treatment. Always seek the advice of your physician or other qualified health provider with any questions you may have regarding a medical condition.